Notes2conf setup manual

Notes2conf makes it possible to automatically create a Microsoft Teams, Zoom, Webex, GoToMeeting or Lifesize meeting link for every meeting you schedule with HCL Notes calendar. No more manually adding Microsoft Teams, Zoom, Webex, GoToMeeting or Lifesize links to calendar events or manually sending mails with conference details to the participants of the meeting.
Notes2conf will create the Microsoft Teams, Zoom, Webex, GoToMeeting or Lifesize conferences for you with the information extracted from your HCL Notes calendar. You will have to define a custom online meeting in HCL Notes first. Detailed configuration instructions for your Notes Domino server can be found in the next sections.
- A HCL/IBM Domino Server
- A HCL/IBM Notes account
- Zoom account or Microsoft Teams account with the required license to create meetings
The Domino configurations listed below must be performed only once by a Domino administrator.
1. Open your existing Notes resource database on your server ("Resource.nsf"). If it doesn't exist because you didn't used it until now, you can easily create it by using the standard "Resource Reservations" template.
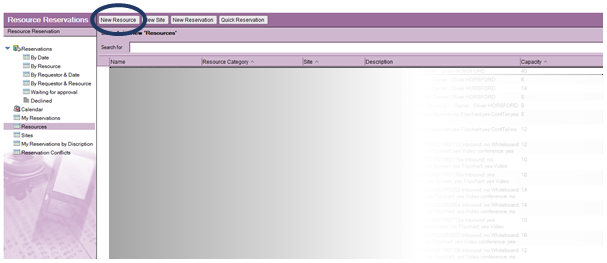
2. Create "New Resource"
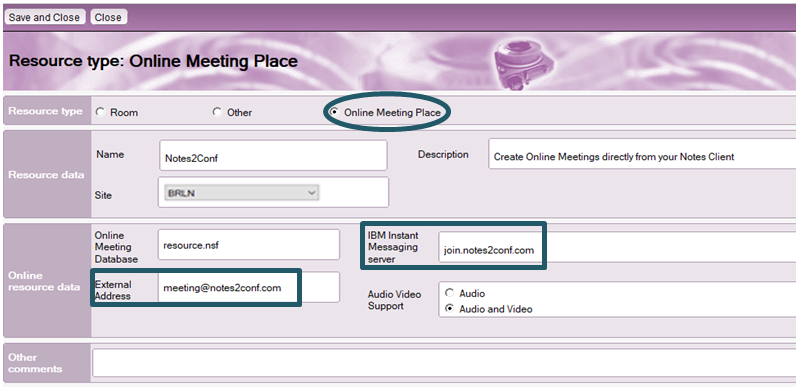
- Resource Type: Online Meeting Place
- Fill in the Resource name, the description and the Online Meeting Database
- The Instant Messaging Server should be: 'join.notes2conf.com'. This field will be missing if the template version of your resource database is 11 or newer.
- external address: meeting@notes2conf.com
- save the new resource
- run the adminp process on the server
- make sure the Rooms & Resource Manager (RnRMgr) task is running on the server otherwise the meetings will not be forwarded to meeting@notes2conf.com
- check for the new entry (resource) in the Domino Directory. After it has replicated to all the servers, the new resource should be available to all users for meetings.

3. Set the prefix of the online meeting join link sent by mail
It is very probable that you already use Policy settings on your Domino server. If you don't have such a Policy you have to create one. Here is the link about how to create Policies and settings:
https://help.hcltechsw.com/domino/10.0.1/conf_creatingadesktoppolicysettingsdocument_t.html
-
If the template version of your resource database is lower than 11, please edit the Desktop Settings document and add the following parameter on the tab Custom settings -> Notes.ini
$CS_OnlineMeeting_Protocol=https, Enforce

-
If the template version of your resource database is 11 or higher, please edit the Desktop Settings document and add the following parameter on the tab Custom settings -> Notes.ini
$CS_OnlineMeeting_Protocol=https://join.notes2conf.com, Enforce

1. Start creating as usual a new meeting in your Notes Client Calendar. You will automatically be the Meeting Leader/Moderator.
- Fill in the participants, date and time
- Choose "Online Meeting"
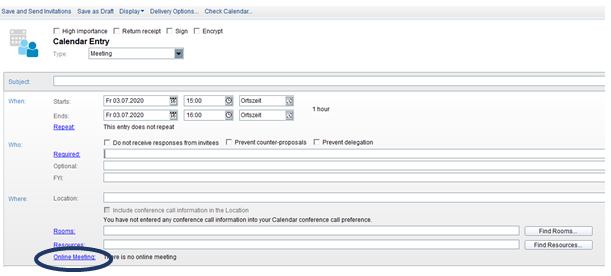
- If you don't have a Notes2conf room defined, you will have to define it manually as described below or you can use the Notes2conf deploy tool to create it automatically.
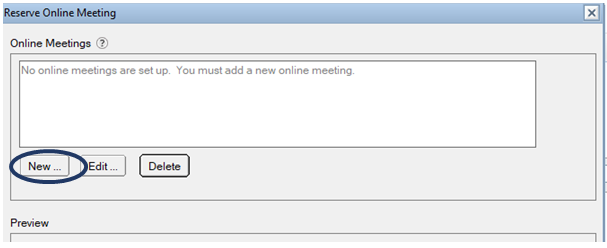
- Press "New"
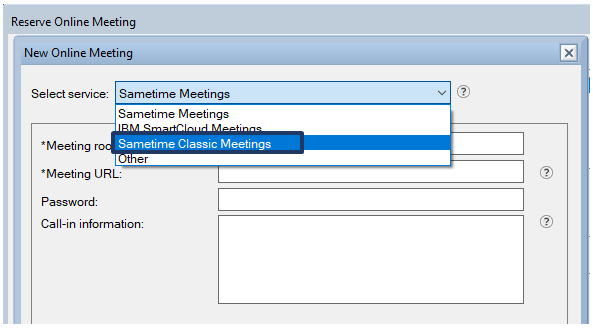
- Choose "Sametime Classic Meetings"
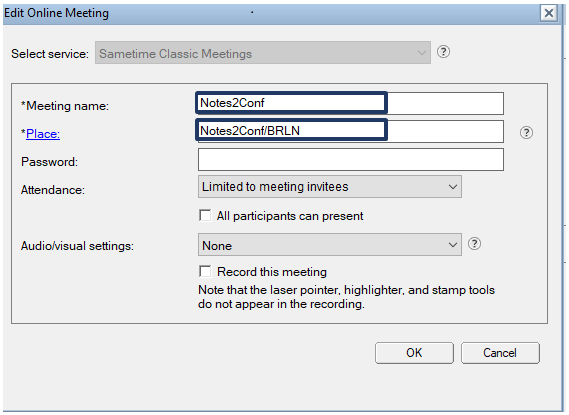
- Fill in the "Meeting name" i.e. Notes2conf
- Click on "Place" and select from the pop-up window the "Notes2conf" resource defined on your Domino server
- You can also protect your meetings with a password/PIN
- Attendance. There are two options here.
If you select "Limited to meeting invitees" then the email addresses of the meeting's participants will be sent to Notes2conf. The participants will be able to recover the meeting's link if they lose it.
If you select "Open meeting to all users" then the email address of the meeting's participants will not be sent to Notes2conf.
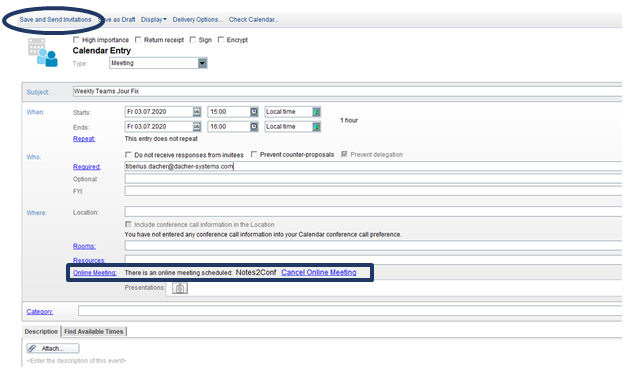
- After the Notes2conf meeting has been defined and selected, press the "Save and Send Invitations" button for your meeting. The meeting is now created and all participants should receive an invitation for the new meeting.
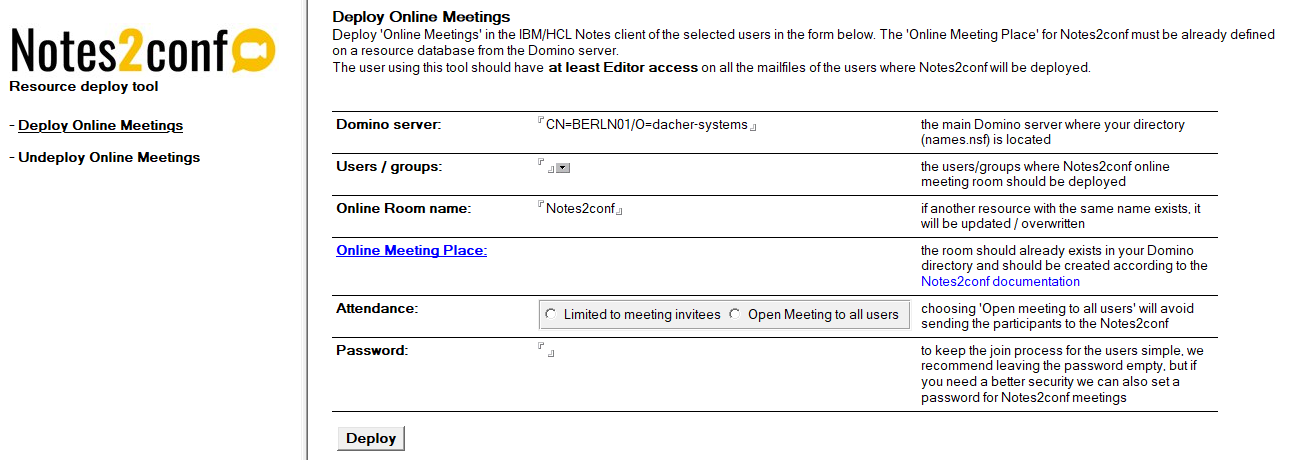
The Notes2conf deploy tool is a Notes database designed for HCL/IBM Notes administrators to automatically create the Notes2conf 'Online Meeting' room in the mail files of the users.
Using this tool eliminates the need to instruct your Notes users to manually create the Notes2conf 'Online Meeting' room as described in the 'HCL/IBM Notes client configuration' section of the Notes2conf documentation.
Click here to download the Notes2conf deploy tool.
Moderators
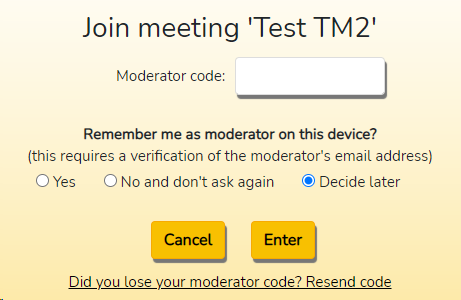
If you are the moderator of the meeting, after creating the meeting in HCL Notes, you will receive a confirmation email from Notes2conf which contains a moderator password. As a moderator you have two options to start the conference:
- click the web link from your HCL Notes calendar. You will be redirected to a Notes2conf page which will ask for your moderator password. Input the moderator password and you will be redirected to the next page where you can choose the type of the conference (Microsoft Teams, Zoom, etc).
- click the web link from your confirmation mail. This web link already contains the moderator password, so you won't be asked to input it manually.
The next step is to choose the conference type and follow the steps provided by the conference system (Microsoft Teams, Zoom, etc) to create and start the conference.

Every moderator will have the opportunity to choose if he/she wants to be remembered as moderator on a device. If the answer is 'yes', a cookie will be created on that device which
will allow the moderator to start other future conferences on that specific device without entering the moderator password. This is very convenient if you are a moderator which creates many conferences and you don't want to search for moderator passwords in your emails.
Participants
As a participant, all you have to do is click on the web link of your conference invitation. If the conference didn't start yet, you will be placed on a waiting page. When the moderator arrives and starts the conference, all participants will be automatically redirected to the conference (Microsoft Teams, Zoom, etc).

Installing from the Zoom Marketplace
- Login to your Zoom account and navigate to the Zoom Marketplace
- Search for Notes2conf and click on the app
- If the app is not pre-approved, please contact your Zoom admin to approve the app for your account
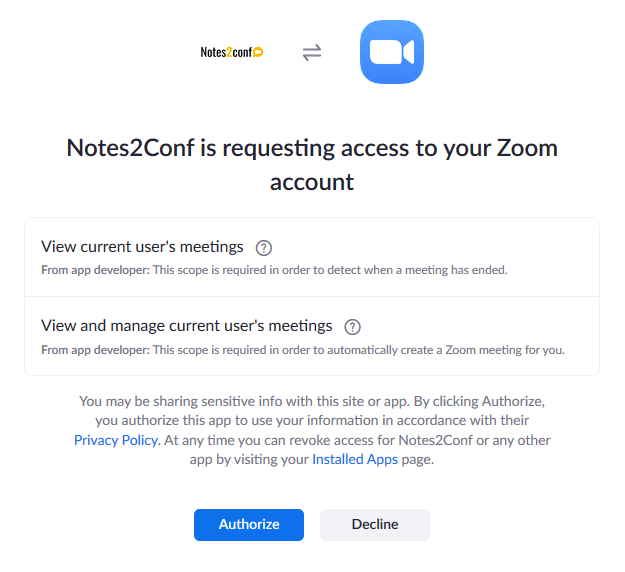
- Click Install, confirm the permissions the app requires, and choose Authorize
Uninstalling the Zoom app
- Login to your Zoom account and navigate to the Zoom Marketplace
- Search for Notes2conf and click the app or navigate to your installed apps via Manage > Installed Apps
- Click Uninstall next to Notes2conf
- Confirm the dialogue and click Uninstall
Installing for organizational accounts and grant admin consent for all users (method 1)
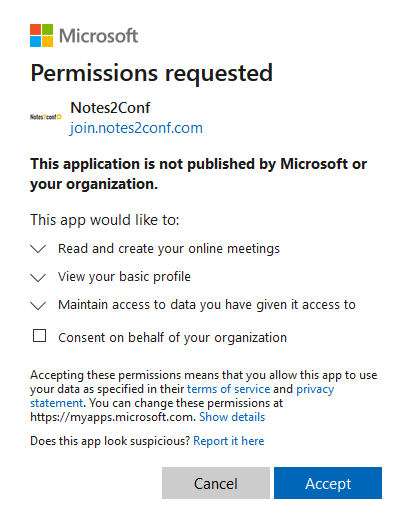
When you will create your first Teams meeting, you will be asked to login with a Microsoft account. In order to grant consent to the Notes2conf app for all users in your organization you will have to sign in the Azure portal with an organizational account which is a Global Administrator.
Microsoft will show a dialog with the required permissions for the Notes2conf app. Please check the "Consent on behalf of your organization" option and click the "Accept" button to install the app for your organisation. Notice that the "Consent on behalf of your organization" option will be visible only if your account is a Global Administrator for your organization.
Installing for organizational accounts and grant admin consent for all users (method 2)
1. When you will create your first Teams meeting, you will be asked to login with a Microsoft account. In order to grant consent to the Notes2conf app for all users in your organization you will have to sign in the Azure portal with an organizational account which is a Global Administrator, an Application Administrator or a Cloud Application Administrator.
Microsoft will show a dialog with the required permissions for the Notes2conf app. Please click the "Accept" button to install the app for your account.
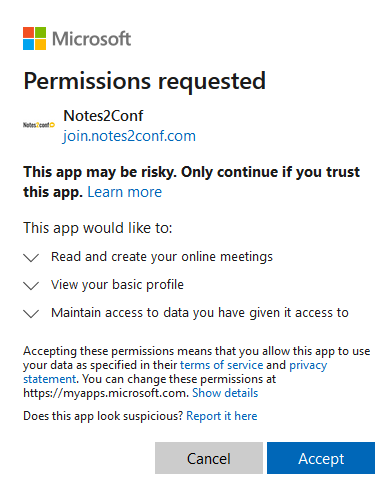
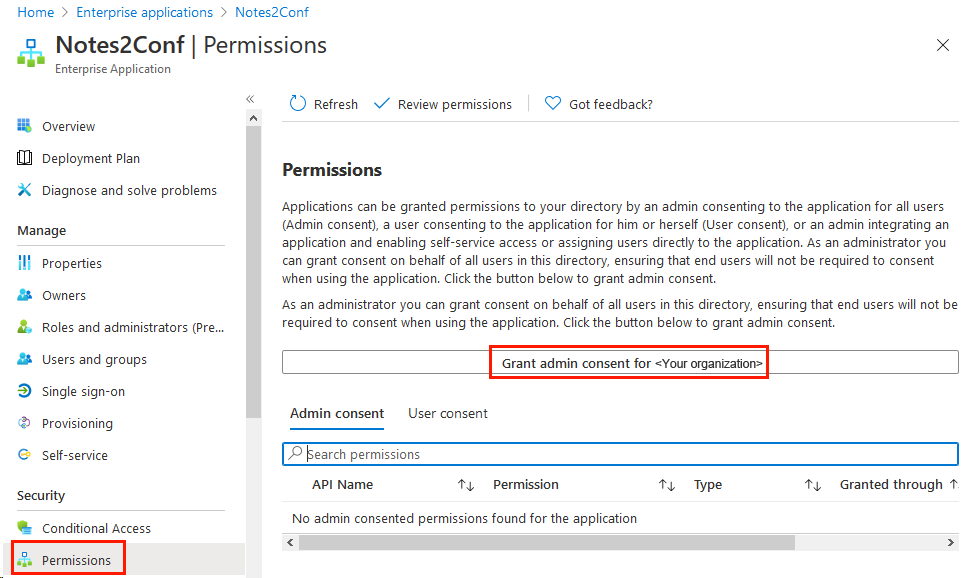
2. Sign in to the Azure portal with a Global Administrator, an Application Administrator or a Cloud Application Administrator account. Go to Azure Active Directory then Enterprise applications and select the Notes2Cont app. Select Permissions and then click Grant admin consent, as shown in the image below.
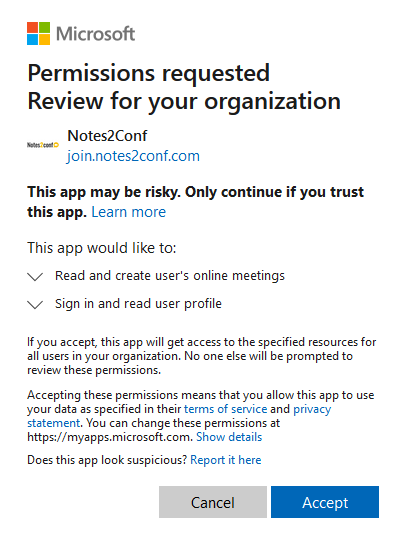
Review the requested permissions and click "Accept" to grant consent for all the users in your organization.
Detailed instructions about granting admin consent in Enterprise apps can also be found here: https://docs.microsoft.com/en-us/azure/active-directory/manage-apps/grant-admin-consent.
Configure admin consent workflow for organizational accounts
If granting admin consent for all users is not suitable for your organization, you can also configure the admin consent workflow. This will allow an administrator to manage which users in your organization can use the Notes2conf app. Detailed instructions about configuring the admin consent workflow can be found here: https://docs.microsoft.com/en-us/azure/active-directory/manage-apps/configure-admin-consent-workflow.
When you will create a Webex meeting, you will be asked to login with a Webex Meetings account. Notes2conf is using Webex REST API to automatically create Webex conferences for you.
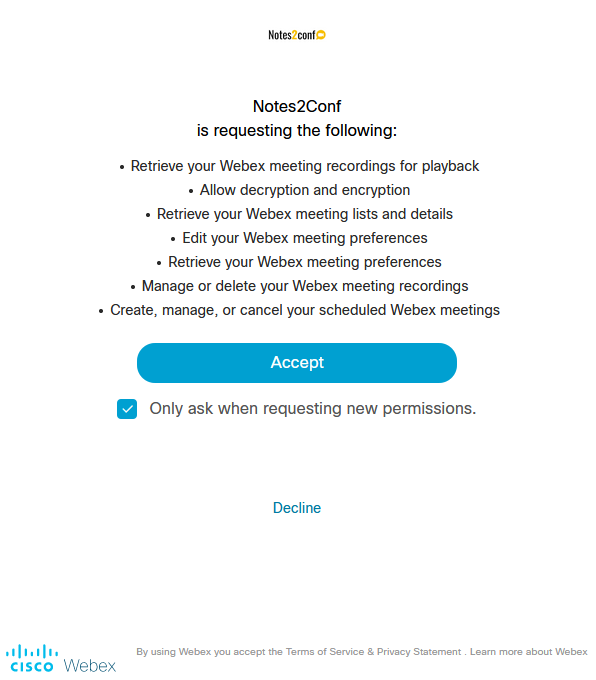
The first time you login you have to allow a few permissions requested by the Notes2conf app. The screen which requests the permissions is similar to the image below.
To use the Webex REST API you'll need to be a Webex Meetings subscriber with a Webex account backed by Cisco Webex Common Identity (CI). If you currently use Webex, your account is backed by Common Identity. If you're using only Webex Meetings, your site will need to be on Common Identity.
Mode details about the Webex REST API can be found here.
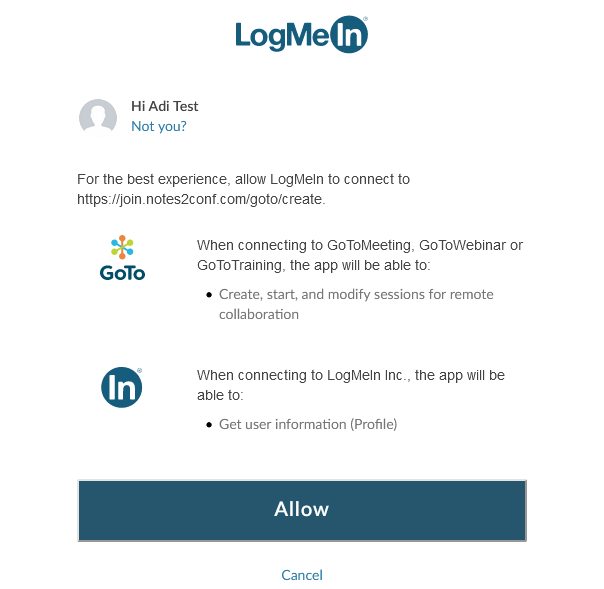
When you will create a GoToMeeting conference, you will be asked to login with a GoToMeeting account. Notes2conf is using GoToMeeting REST API to automatically create GoToMeeting conferences for you.
The first time you login you have to allow a few permissions requested by the Notes2conf app. The screen which requests the permissions is similar to the image below.
Getting a Lifesize Cloud API key
Using Notes2conf with Lifesize requires a Lifesize Cloud API key. If you don't have a valid Lifesize Cloud API key you have to request one from Lifesize. After receiving the Lifesize Cloud API key, please contact the Notes2conf team to set it up for your company.
Details about requesting a Lifesize Cloud API key can be found on the Files section of this page: https://community.lifesize.com/s/group/0F91B0000006M0dSAE/lifesize-cloud-api.
A Lifesize account is required to access the Files section of the above Lifesize web page.
Regular use
When you create a HCL Notes conference hosted with Lifesize, Notes2conf will try to automatically create a Lifesize meeting using the moderator's email address. If this address is not a valid Lifesize email address, you will be asked to enter another email address valid for your Lifesize company account.
After the Lifesize meeting has been created, the moderator and all the participants will be redirected to the Lifesize meeting.
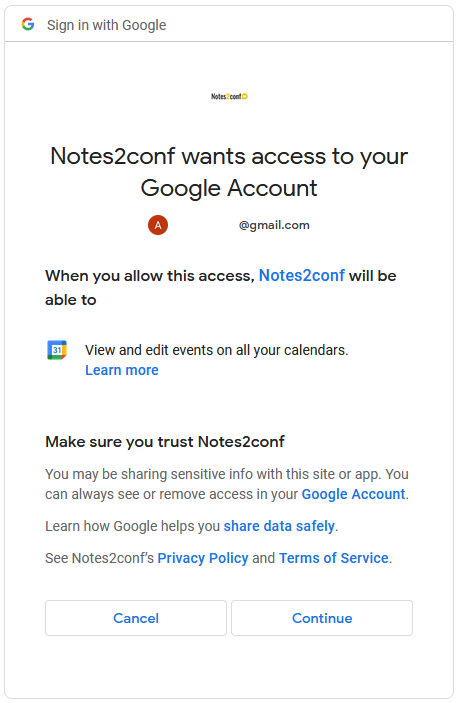
When you will create a Google Meet conference, you will be asked to login with a Google account. Notes2conf is using Google Meet API to automatically create conferences for you.
The first time you create a conference with Notes2conf you have to allow a few permissions requested by the Notes2conf app. The screen which requests the permissions is similar to the image below.
